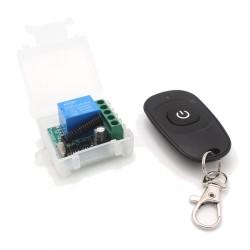
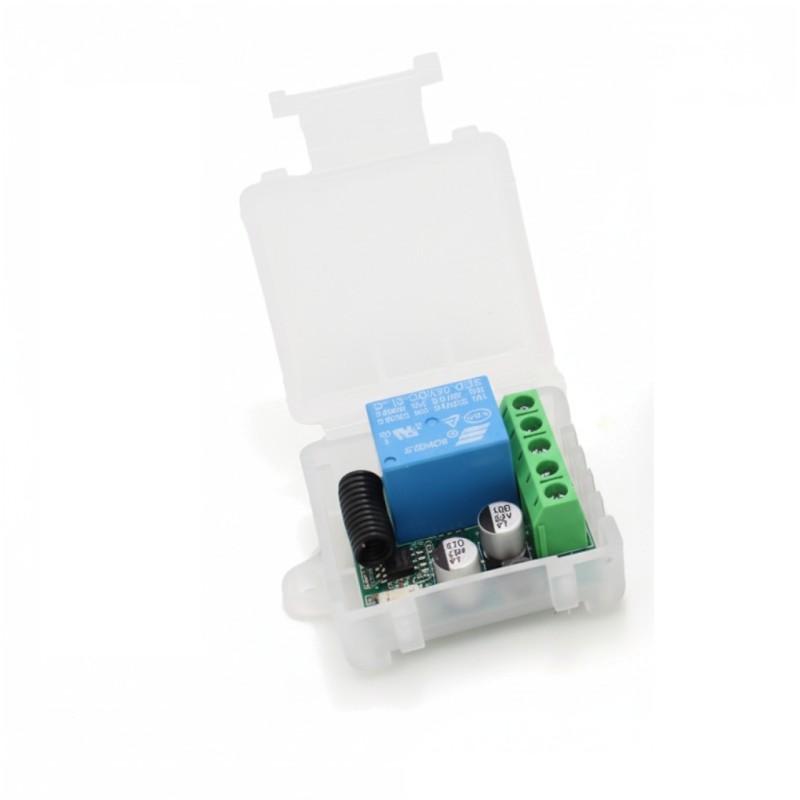


DC 5–30V Input 433MHz 1-Channel RF Wireless Relay Switch Module – Receiver Relay Board Only. Turn anything that uses up to 250VAC 10A or 30VDC 10A on or off using your 433MHz remote control! Remote control sold separately.
 Security policy
(edit with the Customer Reassurance module)
 Delivery policy
(edit with the Customer Reassurance module)
 Return policy
(edit with the Customer Reassurance module)
Product Type: 433MHz Wireless Remote Control Switch
Application: DIY Smart Home Projects, Gate/LED/Appliance Control
Compatibility: EV1527 & Learning Code Transmitters
Input Voltage: DC 5V – 30V
Output Max Voltage & Current Ratings: 250VAC / 10 Amps ; 30VDC / 10 Amps
Working Frequency: 433MHz
Modulation Type: ASK (Amplitude Shift Keying)
Reception Type: Superheterodyne Receiver
Working Modes: Momentary, Toggle, Latching, Time Delay (5s, 10s, 15s)
Standby Current: ≤ 5mA
Receiving Sensitivity: > -97dBm
Control Range: Up to 100 meters (open space; real-world range may vary) (remote control sold separately)
Decoding Method: MCU Software Decoding
Wiring Method: Screw Terminal Pillar
Channel: 1CH (Single Channel Output)
Momentary Mode:
Press and hold the remote button: Relay stays ON
Release the button: Relay turns OFF
Toggle Mode:
Press once: Relay turns ON
Press again: Relay turns OFF
Latching Mode:
Press button A: Relay turns ON
Press button B: Relay turns OFF
Time Delay Mode:
Press the button: Relay activates
Release the button: Timer starts
Relay turns OFF automatically after 5s, 10s, or 15s
Press the Learning Button on the receiver 8 times
All paired remotes will be erased
Reprogramming is required after reset
Press the Learning Button once
LED turns off – enters learning mode
Press the desired remote button
LED blinks then stays ON after 3 seconds – pairing successful
Press the Learning Button twice
LED turns off – enters learning mode
Press the remote button you want to pair
LED blinks then stays ON – pairing successful
Important: In Latching Mode, you must program two different buttons — one for ON and one for OFF. (for this mode you need a different 433mhz remote with 2 buttons other than the one included)
Press the learning button on the receiver three times
The LED indicator will flash briefly and turn off, indicating it's in latching learning mode
Press the remote button A (this will act as the ON command) – the LED flashes 5 times
Press the remote button B (this will act as the OFF command) – the LED flashes 5 times again
After 3 seconds, the LED turns back on – learning completed successfully
Example:
Button A = ON
Button B = OFF
Time delay modes allow the relay to stay active for a set time after the remote is pressed.
5-Second Delay: Press the learning button 4 times
10-Second Delay: Press the learning button 5 times
15-Second Delay: Press the learning button 6 times
Steps:
Press the learning button 4, 5, or 6 times depending on your desired delay time
The LED will turn off – module enters delay learning mode
Press the remote control button to pair
The LED flashes and then turns off
After 3 seconds, the LED turns on again – time delay learning successful
This feature allows the relay to automatically turn ON when power is restored (ideal for lights, alarms, etc.).
Press the learning button 8 times in succession
The LED indicator will blink once, then stay lit
Press the remote button you wish to assign
The LED will flash 3 times – power-on function learning successful
Note:
This is also known as the “power-on auto-start” or “power restore activation” mode.
If you want to switch to other operating modes later, you must clear all codes first by resetting the receiver.
Wide Voltage Support (DC 5V–30V) – Ideal for multiple power environments
Stable RF Performance – Superheterodyne receiver ensures low interference and strong signal
Versatile Control Options – 4 operational modes suit various use cases
Compact, DIY-Friendly Design – Perfect for smart home projects and automation systems
Remote Learning Code Compatibility – Supports learning code remotes like EV1527
1 × 433MHz RF Receiver Module (Remote sold separately)

DC 5–30V Input 433MHz 1-Channel RF Wireless Relay Switch Module – Receiver Relay Board Only. Turn anything that uses up to 250VAC 10A or 30VDC 10A on or off using your 433MHz remote control! Remote control sold separately.